The Scheduler library allows the Arduino Due to manage multiple tasks at the same time. By setting up a number of other functions that run the same way loop() does, it’s possible to have separate looping functions without a dedicated timer.
- Arduino Due Board
- three LEDs
- three 220 ohm resistors
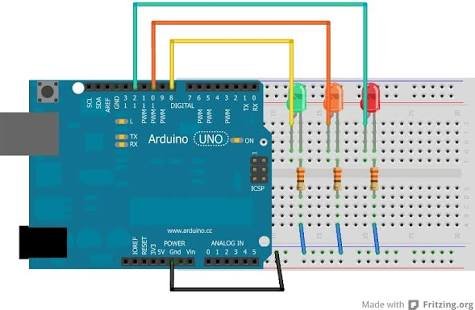
The Circuit
The anode of the LEDs are connected in series with a 220-ohm resistor to pins 11, 12, and 13 on the Due. Their cathodes connect to ground.
Code
#include <Scheduler.h>int led1 = 12;
int led2 = 10;
int led3 = 8;
void setup() {
Serial.begin(9600);
// Setup the 3 pins as OUTPUT
pinMode(led1, OUTPUT);
pinMode(led2, OUTPUT);
pinMode(led3, OUTPUT);
// Add “loop2” and “loop3” to scheduling.
// “loop” is always started by default.
Scheduler.startLoop(loop2);
Scheduler.startLoop(loop3);
}
// Task no.1: blink LED with 1 second delay.
void loop() {
digitalWrite(led1, HIGH);
// IMPORTANT:
// When multiple tasks are running ‘delay’ passes control to
// other tasks while waiting and guarantees they get executed.
delay(1000);
digitalWrite(led1, LOW);
delay(1000);
}
// Task no.2: blink LED with 0.1 second delay.
void loop2() {
digitalWrite(led2, HIGH);
delay(100);
digitalWrite(led2, LOW);
delay(100);
}
// Task no.3: accept commands from Serial port
// ‘0’ turns off LED
// ‘1’ turns on LED
void loop3() {
if (Serial.available()) {
char c = Serial.read();
if (c==‘0’) {
digitalWrite(led3, LOW);
Serial.println(“Led turned off!”);
}
if (c==‘1’) {
digitalWrite(led3, HIGH);
Serial.println(“Led turned on!”);
}
}
// IMPORTANT:
// We must call ‘yield’ at a regular basis to pass
// control to other tasks.
yield();
}
